Blade Templates
The Blade is PHP templating engine. The Blade template allows using PHP code directly. The file extension is .blade.php and is stored in the resources/views directory
Blade is the simple, yet powerful templating engine that is included with Laravel.
When compared to other templating engines, Blade is unique in the following ways −
1.It does not restrict the developer from using plain PHP code in views.

2.The blade views thus designed, are compiled and cached until they are modified.
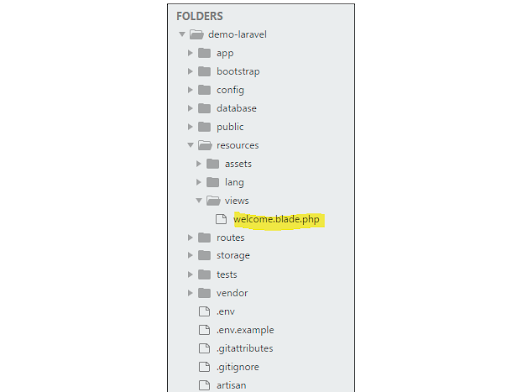
The complete directory structure of Laravel is shown in the screenshot given here.
You can observe that all views are stored in the resources/views directory and the default view for Laravel framework is welcome.blade.php.
Blade Components
The Blade component is similar to sections, layouts, and includes. We can create two types of components.
- Class-based components
In the class based components approach the component has two files a PHP class located in App/View/Components directory and a view file located in resources/views/components directory. To create such component you can use the artisan command like so:
php artisan make:component LatestPosts
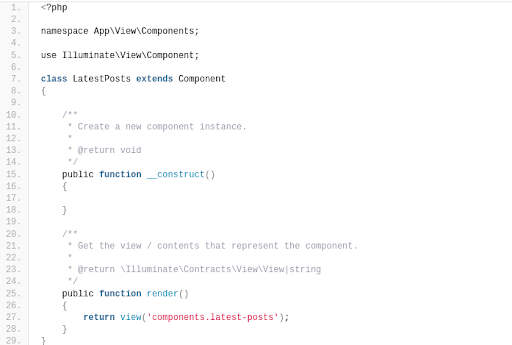
Once running this command you will see two files created, which are app/View/Components/LatestPosts.php and resources/views/components/latest-posts.blade.php.
app/View/Components/LatestPosts.php
resources/views/components/latest-posts.blade.php
To display the component in your blade template we can call it using a custom
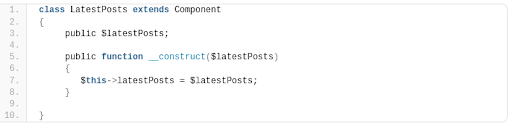
Now let’s see how to pass data to the component. Imagine this component render a list of posts coming from database, in our case i will just add a simple array for demonstration purposes. To accomplish that you have to define the data as public properties in the component class like so:
Anonymous components
To create an anonymous component, you may use the --view flag when invoking the make:component command.
php artisan make:component admin.form.input --view
The above command will create a Blade file at resources/views/components/admin/form/input.blade.php
Component Nesting
To clarify this let’s create a component to display just one post so in the terminal run this command to generate the component:
php artisan make:component Post
Now open the Post component class we just created and update it as shown:
app/View/Components/Post.php
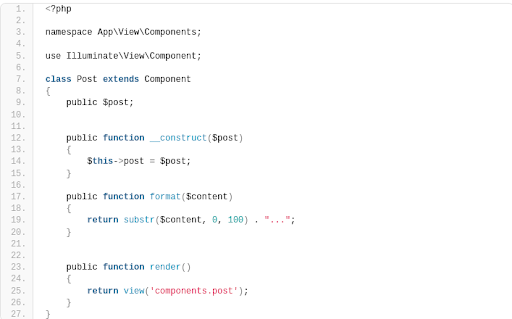
As you see i declared the $post property and injected it in the constructor.
Steps for Creating a Blade Template Layout
You will have to use the following steps to create a blade template layout −
Step 1
Create a layout folder inside the resources/views folder. We are going to use this folder to store all layouts together.
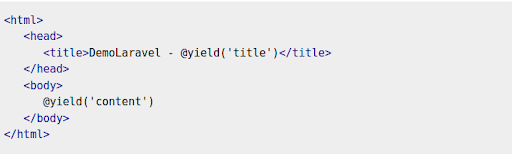
Create a file name master.blade.php which will have the following code associated with it −

Step 2
In this step, you should extend the layout. Extending a layout involves defining the child elements. Laravel uses the Blade @extends directive for defining the child elements.
When you are extending a layout, please note the following points −
Views defined in the Blade Layout injects the container in a unique way.

Various sections of view are created as child elements.

Child elements are stored in layouts folder as child.blade.php
An example that shows extending the layout created above is shown here −